I would suggest you try something like this:
1) Select the menu option
Help > Open Sample Project, and choose ManyScenes.magic
2) Now select the menu option
Scene > Add/Update Post-Processing Scene
3) Now look at the Post-Processing scene. It should look like this:

- twoSceneInputs.PNG (11.17 KiB) Viewed 6671 times
4) Now, just as an example, insert another module between the SceneInputs and the Magic module:
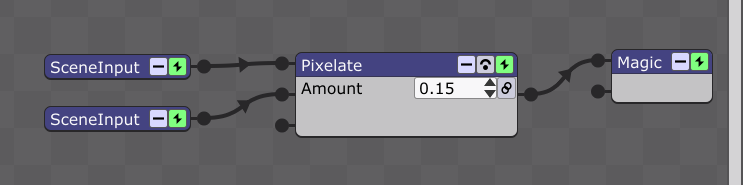
- Pixelate.PNG (20.6 KiB) Viewed 6671 times
5) Now go look at all the other scenes. You will see that they all show the Pixelate effect. This is because the last module in every other scene is the Post-Processing module:
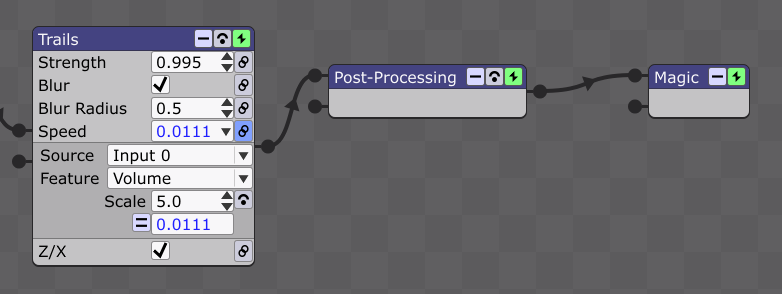
- PostProcessing.PNG (39.1 KiB) Viewed 6671 times
6) The Post-Processing module represents the Post-Processing scene. So, any effects you put in the scene (as in step 4) will affect how the module behaves in all the other scenes.
As Sadler said, the Post-Processing scene is useful for overall color adjustments, but can also be handy for things like overlaying logos/text, antialiasing, and even basic projection mapping.